Burned Edge Effect in Adobe PhotoShop
and Metacreations Painter
Chong Ho Yu, Ph.D.
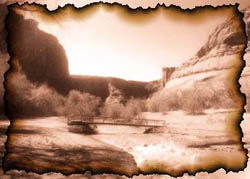
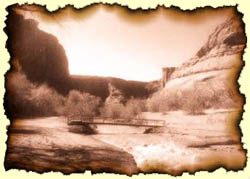
You can create a burned edge effect in both PhotoShop and Painter. It is easier to do it in Painter because the effect is built-in. In addition, in PhotoShop you cannot apply this effect to every image. The cyan channel of the picture should be dropped first before the burned edge effect is applied (see Sepia effect). But Painter can impose this effect on any picture.
- Use the Lasso tool to select an irregular edge around the picture.
- Apply Inverse from Selection.
- Apply Feather from Selection. Set the feather pixel to 3-4.
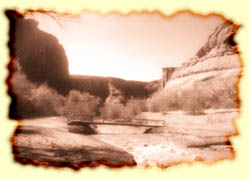
- Delete the selection. The picture should look like the one on the right.
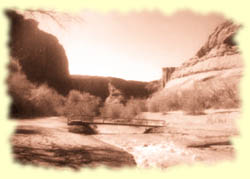
- Select Inverse from Selection again.
- Select a brown color.
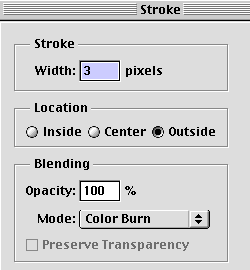
- Select Stroke from Edit. In the Stroke options. Choose Color Burn as the mode, Outside as the location, and set pixels to 3.